Written this post long time back and now we have a better solution. Go to this URL and right click and look into the source. http://michaelhue.com/cssdock/ Pretty straight forward. nJoy!
Yesterday was looking through ISpazio developer site (
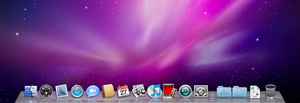
http://www.spaziocellulare.com/ispazio/developers/index2.php) and was really impressed with the DOCK they have created at there website! It looked super cool! After couple of hrs of research here is a DOCK for you. Its easy to use and can be used in BLOGS and personal websites. The code used has main three parts. 1) The CSS style. 2) Java script for dynamic look. 3) Html to display the dock on page.
1) The CSS Style: The following code needs to be place within
<head> and
</head> Just copy and paste it in your blogger template
<script type="text/javascript">
var xm = xmb = ov = 0;
var M = true;

function dock(dock, sMin, sMax)
{
this.icons = document.getElementById(dock).getElementsByTagName('img');
this.N = this.icons.length;
this.s = sMin;
this.ovk = 0;
this.pxLeft = function(o)
{
for(var x=-document.documentElement.scrollLeft; o != null; o = o.offsetParent) x+=o.offsetLeft;
return x;
}
for(var i=0;i<this.N;i++)
{
with(this.icons[i])
{
style.width = sMin+"px";
style.height = sMin+"px";
className = "dockicon";
}
}
this.run = function()
{
with(this)
{
for(var i=0;i<N;i++)
{
var o = icons[i];
var W = parseInt(o.style.width);
if(ov && ov.className=="dockicon")
{
if(ov!=ovk)
{
ovk=ov;
document.getElementById("legend").innerHTML = ov.lang;
}
if(M) W = Math.max((s*Math.cos(((pxLeft(o)+W/2)-xm)/sMax)),sMin);
s = Math.min(sMax,s+1);
}
else
{
s = Math.max(s-1,sMin);
W = Math.max(W-N,sMin);
}
o.style.width = W+"px";
o.style.height = W+"px";
}
if(s >= sMax) M = false;
}
}
}
document.onmousemove = function(e)
{
if(window.event) e=window.event;
xm = (e.x || e.clientX);
if(xm!=xmb){
M = true;
xmb = xm;
}
ov = (e.target)?e.target:((e.srcElement)?e.srcElement:null);
}
window.onload = function()
{
dock = new dock("dock", 30, 85);
setInterval("dock.run()", 16);
}
</script>
2) Java script for dynamic look: The following code also needs to be place within
<head> and
</head> Just copy and paste it in your blogger template or html page. Remember not to modify anything in this until you are aware of what you are doing. :wink
<script type="text/javascript">
var xm = xmb = ov = 0;
var M = true;

function dock(dock, sMin, sMax)
{
this.icons = document.getElementById(dock).getElementsByTagName('img');
this.N = this.icons.length;
this.s = sMin;
this.ovk = 0;
this.pxLeft = function(o)
{
for(var x=-document.documentElement.scrollLeft; o != null; o = o.offsetParent) x+=o.offsetLeft;
return x;
}
for(var i=0;i<this.N;i++)
{
with(this.icons[i])
{
style.width = sMin+"px";
style.height = sMin+"px";
className = "dockicon";
}
}
this.run = function()
{
with(this)
{
for(var i=0;i<N;i++)
{
var o = icons[i];
var W = parseInt(o.style.width);
if(ov && ov.className=="dockicon")
{
if(ov!=ovk)
{
ovk=ov;
document.getElementById("legend").innerHTML = ov.lang;
}
if(M) W = Math.max((s*Math.cos(((pxLeft(o)+W/2)-xm)/sMax)),sMin);
s = Math.min(sMax,s+1);
}
else
{
s = Math.max(s-1,sMin);
W = Math.max(W-N,sMin);
}
o.style.width = W+"px";
o.style.height = W+"px";
}
if(s >= sMax) M = false;
}
}
}
document.onmousemove = function(e)
{
if(window.event) e=window.event;
xm = (e.x || e.clientX);
if(xm!=xmb){
M = true;
xmb = xm;
}
ov = (e.target)?e.target:((e.srcElement)?e.srcElement:null);
}
window.onload = function()
{
dock = new dock("dock", 30, 85);
setInterval("dock.run()", 16);
}
</script>
3) Html to display the dock on page: Now we are done with the complex part and here is the easy part to do. OK you can place this code anywhere inside
<body> and
</body> If you want to use in blogger you fight need to find a bit where exactly u want to place this. The CSS has been configured to display the doc at the bottom.
<div id="dock">

<a href="http://classictutorials.blogspot.com/" target="_top"><img src="http://YOUR IMAGE HOSTING/IphoneBrowser.png" lang=""></a>
<a href="http://classictutorials.blogspot.com/" target="_top"><img src="http://YOUR IMAGE HOSTING/IphoneCalculator.png" lang=""></a>
<a href="http://classictutorials.blogspot.com/" target="_top"><img src="http://YOUR IMAGE HOSTING/IphoneCalendar.png" lang=""></a>
<a href="http://classictutorials.blogspot.com/" target="_top"><img src="http://YOUR IMAGE HOSTING/IphoneChat.png" lang=""></a>
<a href="http://classictutorials.blogspot.com/" target="_top"><img src="http://YOUR IMAGE HOSTING/IphoneClock.png" lang=""></a>
<a href="http://classictutorials.blogspot.com/" target="_top"><img src="http://YOUR IMAGE HOSTING/IphoneGraph.png" lang=" "></a>
<a href="http://classictutorials.blogspot.com/" target="_top"><img src="http://YOUR IMAGE HOSTING/IphoneiPod.png" lang=""></a>
<a href="http://classictutorials.blogspot.com/" target="_top"><img src="http://YOUR IMAGE HOSTING/IphoneMaps.png" lang=""></a>
<a href="http://classictutorials.blogspot.com/" target="_top"><img src="http://YOUR IMAGE HOSTING/IphoneNotes.png" lang=""></a>
<a href="http://classictutorials.blogspot.com/" target="_top"><img src="http://YOUR IMAGE HOSTING/IphonePhone.png" lang=""></a>
<a href="http://classictutorials.blogspot.com/" target="_top"><img src="http://YOUR IMAGE HOSTING/IphoneSettings.png" lang=""></a>
<a href="http://classictutorials.blogspot.com/" target="_top"><img src="http://YOUR IMAGE HOSTING/IphoneWeather.png" lang=""></a>
<div id="legend"></div></div>
Need to do.- Upload required images to your image hosting server like google pages and replace the URL
- This blog URL can be replace by any URL of your choice
- Lang is currently blank. If you provide any info in it it will display in the doc on mouse hover!
Hope you like this tutorial. You can obviously post me anytime for any help. :wink Special thanks to dhteumeuleu.com! If you want those iphone icons here are they!
Download